What Micro Realism Actually Is
Pick up a photograph and crop it down to a rectangle the size of a matchbook. Every shadow, every highlight, every transition of tone still needs to read clearly. That's the visual challenge at the heart of this style. Photorealistic imagery, compressed into a footprint that rarely exceeds six to eight centimetres, executed on living skin that moves, stretches, and heals on its own schedule.
How it differs from standard realism
Full-scale realism gives an artist room to breathe. A portrait spanning a thigh can carry fine hair detail, soft background gradients, and complex mid-tone transitions across centimetres of space. The goal with micro work is identical, but the space is a fraction of that. Every element must earn its place. Nothing is decorative filler.
The studio's micro realism tattoo service sits at the intersection of restraint and precision. It attracts clients who want something personal and detailed without committing to large coverage. And it attracts them, frankly, because the results are striking when the craft is right.
Why the small scale changes everything
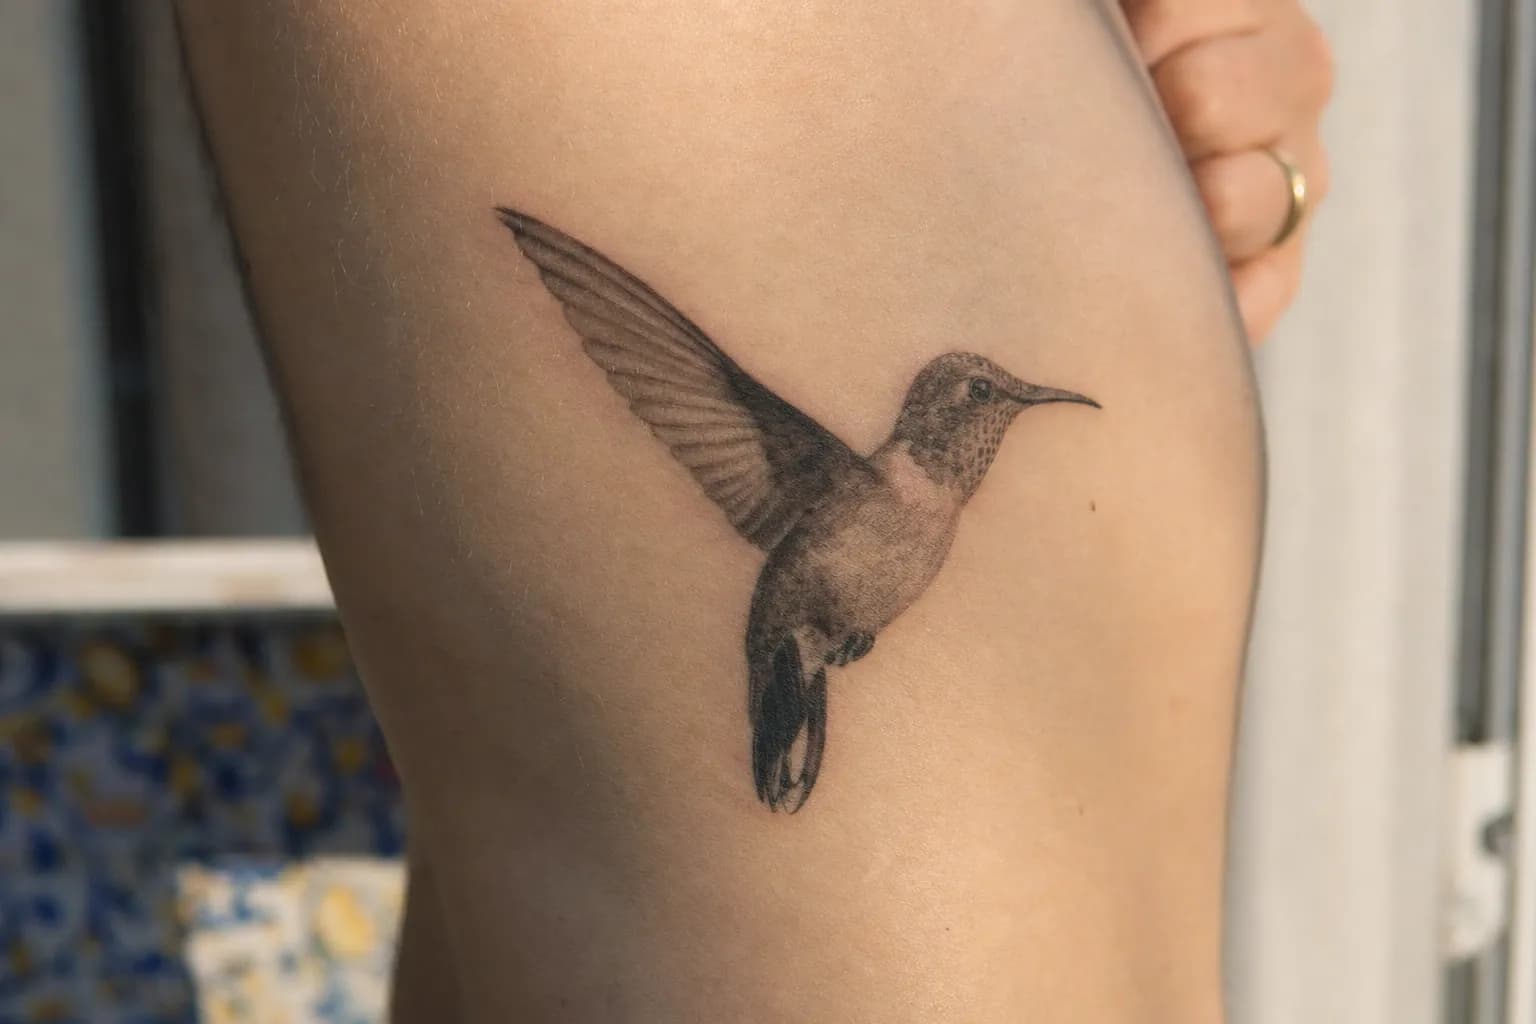
Take the hummingbird forearm piece the studio completed recently. A hummingbird's iridescent feathers, the blur of its wings, the precise geometry of its beak. All rendered within a compact area on the inner forearm.
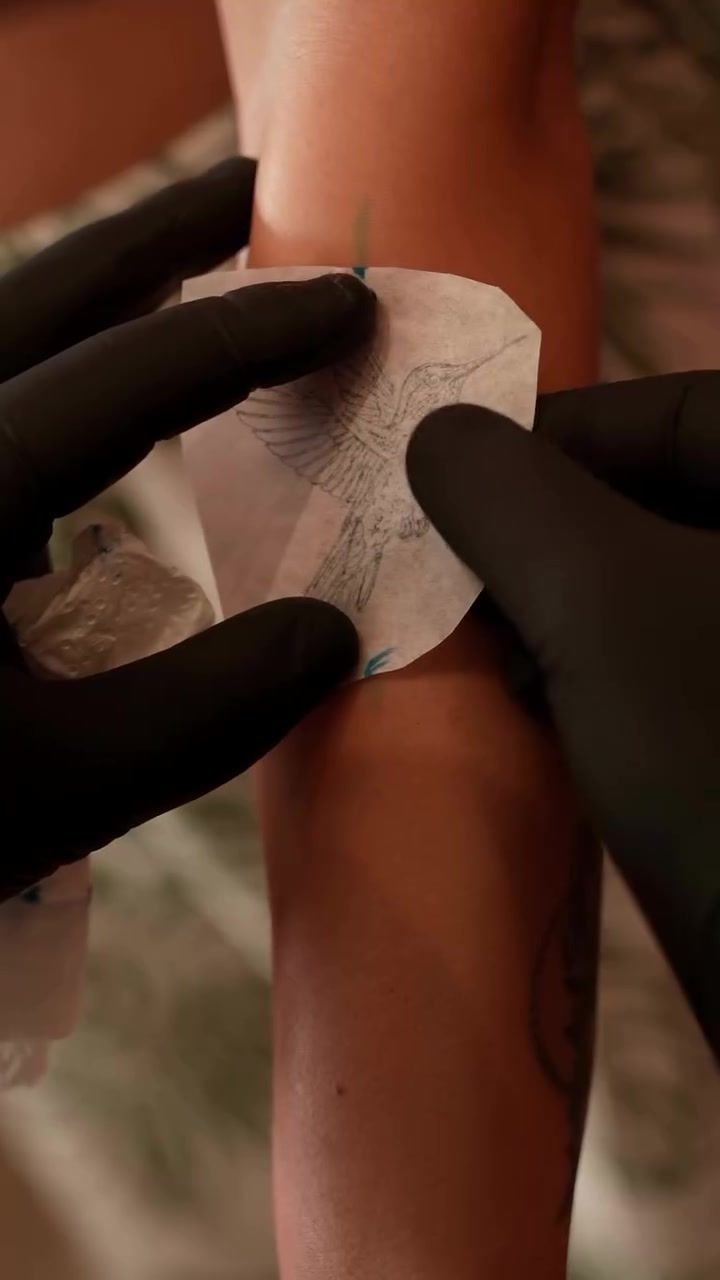
At this scale, a line that wanders half a millimetre reads as a visible error. There is nowhere to hide imprecision. A slightly soft edge that might disappear in a larger piece becomes the dominant feature of a small one.
The Craft Behind a Micro Realism Tattoo
Needle choice and line weight
The needles used for this work are narrower than most clients expect. A single-needle configuration (abbreviated 1RL in the industry, meaning one round liner) draws the finest possible line, close to 0.3mm. A 3RL, three needles grouped in a tight round formation, allows slightly more ink deposit while keeping detail sharp. Switching between these during a session lets the artist control both precision and depth at micro scale.
Heavier needle groupings, common in bold realism work, would saturate too large an area. The ink spread, known as ink migration or blowout when it goes wrong, can obliterate the fine boundaries between light and shadow that make a tiny photorealistic image readable.
Shading and tonal compression
Tonal compression is the craft concept that separates artists who do this well from those who struggle with it. In a large realism piece, you might have five centimetres of gradual tonal shift from the deepest shadow to the brightest highlight. In a small detailed piece, that same value range has to travel across one centimetre. Compress it too aggressively and the mid-tones muddy together into a flat grey mass. Leave too much contrast and the piece looks harsh and posterised.
Getting that balance right requires adjusting ink dilution ratios, slowing machine speed through critical transitions, and knowing exactly when to stop adding passes over an area. One pass too many in a concentrated zone can close up negative space that won't recover.
Common myths about "just making it small"
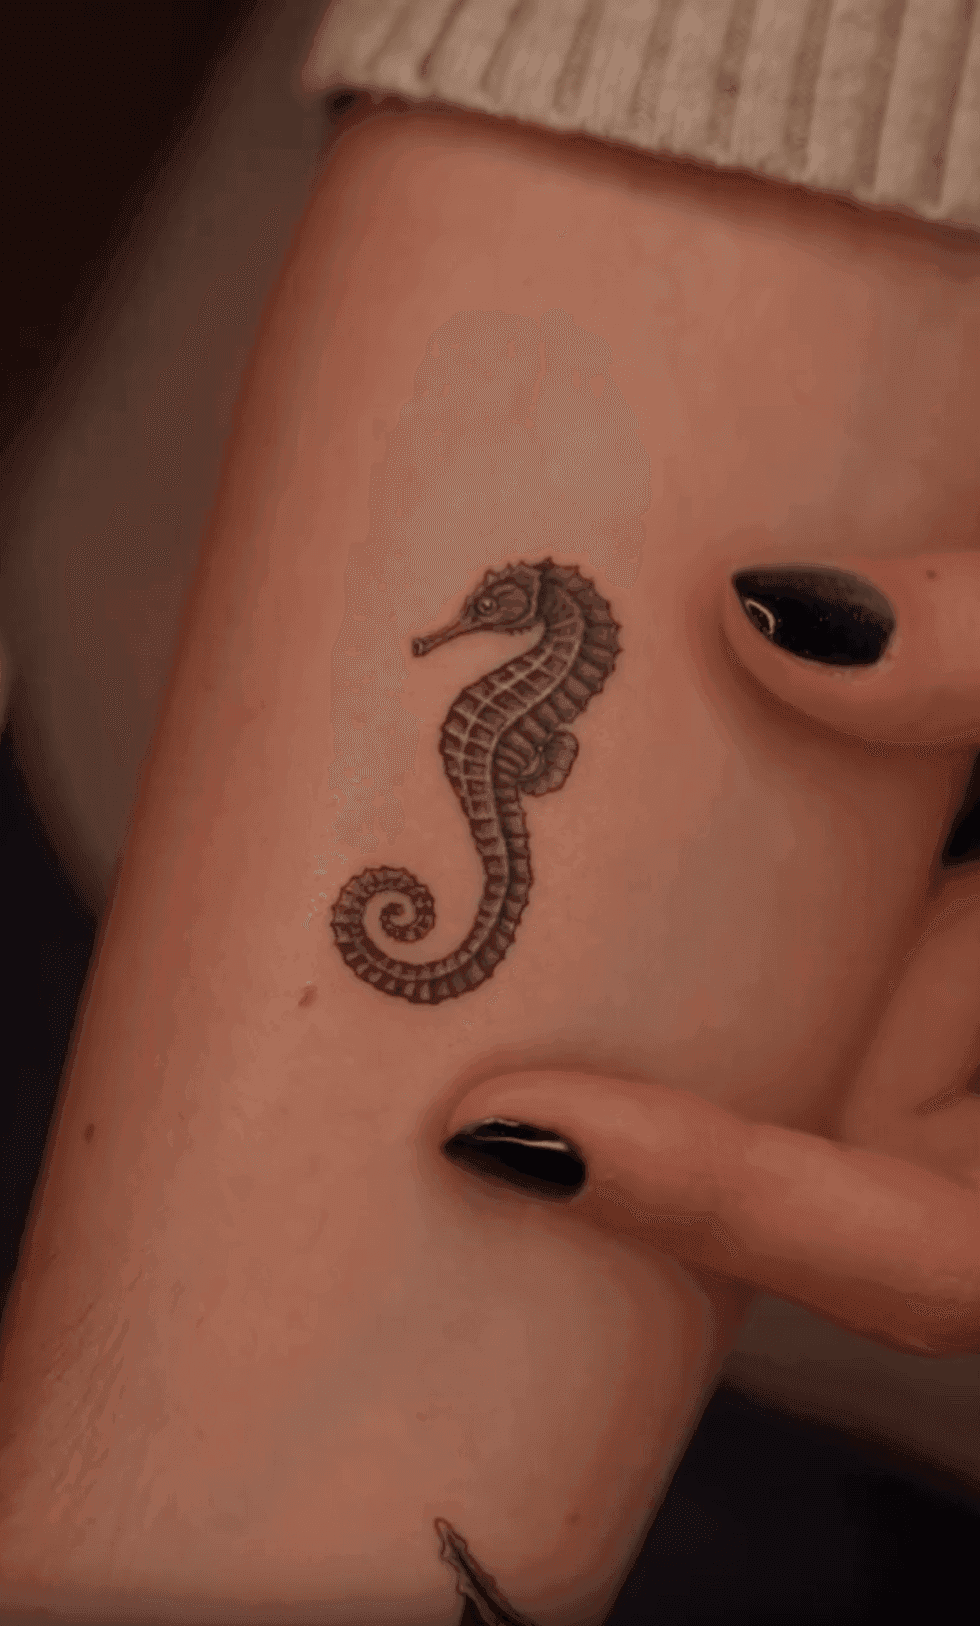
A realism artist who works at large scale cannot simply reduce a design and execute it the same way. The technique is genuinely different. Stencil placement is one example: if a stencil sits two millimetres off-centre on a full-back piece, it's barely noticeable. On a five-centimetre design, that same two millimetres is a proportionally enormous error that skews the entire composition.
Ink saturation decisions also shift. Smaller pieces need careful ink volume control because there's less surrounding skin to absorb and anchor pigment. Too little and the piece heals patchy. Too much and the fine lines spread as the skin heals, losing the crispness the style depends on.
What the Studio Does Differently
The consultation and reference process
The studio asks for high-resolution references, not screenshots. This matters more than it sounds. A screenshot of a hummingbird grabbed from Instagram might be 400 pixels wide. Blown up on a monitor during consultation, it pixelates, hiding whether the light source is clear, whether there's enough tonal contrast, and whether the subject will simplify well at the intended size.
A high-resolution image, ideally printed or shared from the original file, lets the artist assess contrast range, background complexity, and the density of fine detail before committing to any design direction. References that look rich on a phone screen sometimes flatten completely when evaluated properly for scale.
"The reference image is half the conversation. If it's a low-resolution screenshot with a busy background and flat lighting, we'll spend the consultation problem-solving rather than designing."
During consultation, the artist also sets a minimum size threshold for each design, based on how much tonal information the subject carries. A subject like a moth or a geometric eye might translate at four centimetres. A human portrait with readable facial features rarely works below six. The studio won't compress a complex subject below that threshold, because the result won't hold up after healing.
Combining micro realism with geometric or fineline elements
Some of the studio's most requested pieces are hybrids. A photorealistic subject framed within precise geometric linework creates a strong visual contrast between organic and mathematical. The Marcus Aurelius in Sacred Geometry piece shows this clearly: a rendered portrait of the emperor, recognisably photorealistic, set within structured geometric framing that sharpens the whole composition.
The studio's fineline work pairs naturally with small photorealistic subjects too. Single-needle botanical elements around a micro portrait, or fine geometric line borders around a small animal study, add visual context without crowding the focal point. The key is keeping those supporting elements genuinely fine so they don't visually compete with the tonal depth of the main subject.
Placement, Size, and Longevity: What You Need to Know
Best placements for micro realism
Where the tattoo sits on your body affects how long it stays sharp. Stable canvases with consistent skin thickness and low daily friction hold fine detail far better than high-movement or high-friction zones. The forearm, upper arm, and calf are reliable choices for small detailed work. The ribcage moves significantly with every breath during the session, which adds difficulty for the artist. Fingers and inner wrists fade quickly due to constant friction and thinner skin.
| Placement | Skin Stability | Friction Risk | Longevity for Fine Detail |
|---|---|---|---|
| Upper arm (outer) | High | Low | Excellent |
| Forearm (inner or outer) | High | Low-Medium | Very good |
| Calf | High | Low | Very good |
| Ribcage / side | Medium | Medium | Moderate |
| Inner wrist | Low | High | Fair. Expect softening |
| Fingers / hands | Low | Very high | Poor for fine detail |
How Lisbon's climate affects healing
Lisbon's summers are genuinely humid, particularly in July and August when temperatures in Alfama and Cais do Sodré regularly sit above 35°C. Fresh tattoos sweat. Sweat softens the healing surface layer and, on a piece with compressed fine detail, that can blur lines during the critical first two weeks. The studio advises clients booking in summer to plan for rigorous aftercare: loose clothing over the piece, avoiding direct sun on the fresh tattoo, and keeping the area dry after any outdoor activity.
Autumn and winter in Lisbon are mild by northern European standards. Cooler, drier conditions mean the skin heals more predictably, with less moisture interference. Many regular clients specifically book their more complex small-scale work between October and February for this reason. If you're visiting Lisbon and considering a tiny photorealistic tattoo, that booking window is worth knowing about.
Preparing for Your Micro Realism Session
Small detailed work demands skin in the best possible condition. The fine needle configurations used in this style respond noticeably to skin hydration. Dry, flaky skin causes the needle to drag slightly, which affects ink deposit consistency. Moisturising the area daily for two to three weeks before your session makes a real, practical difference to how cleanly the work goes in.
- Hydrate properly in the week before your session. Two litres of water a day isn't a cliché here; well-hydrated skin holds ink more evenly and handles needle passes with less trauma.
- Moisturise the placement area daily for at least two weeks prior. Use an unscented lotion. Avoid the day of the session itself. Slightly tacky skin makes stencil placement harder.
- Sleep well the night before. Fatigue affects skin response and your ability to stay still during detailed work.
- Eat a proper meal two to three hours before your appointment. Low blood sugar during a session causes involuntary movement and makes the process harder for everyone.
- Bring your reference images in the highest resolution you have. Printed references are ideal. If digital, send the original file rather than a compressed screenshot.
Session length for this style runs between one and a half and three hours, depending on complexity. That's not especially long compared to large realism work, but the concentration required means breaks are built in. Don't book back-to-back plans for the same day.
Aftercare for small detailed tattoos has one particular trap: over-moisturising. Applying thick ointment too frequently keeps the surface too wet, which can cause fine lines to soften as the skin sheds its healing layer. A thin application of unscented aftercare cream, two to three times a day, is sufficient. More is not better here.
- Avoid soaking the piece in water (pools, baths, the sea) for at least three weeks.
- Keep direct sun off the fresh tattoo entirely until it's fully healed, around six to eight weeks.
- Don't pick at any peeling skin. This is where clients accidentally lift pigment from fine-detail areas.
- If you're unsure whether your aftercare routine is right, contact the studio directly rather than guessing.
The level of care that goes into aftercare mirrors what goes into the session itself. If you're curious about how that precision thinking applies to text-based work, the guide on what precision lettering work demands covers similar territory from a different angle.
Frequently Asked Questions
How small can a micro realism tattoo actually be?
Most pieces in this style sit between four and eight centimetres at their widest point. Below four centimetres, complex subjects like faces or animals lose readable detail as the skin heals and lines settle. The artist sets a minimum size per design during consultation, based on how much tonal information the subject requires to remain legible.
Will a micro realism tattoo blur or fade faster than a larger piece?
Fine lines and compressed shading in small pieces can soften more visibly over time than bold, large-scale work. Placement matters enormously: high-friction zones like fingers or inner wrists accelerate this. A well-placed piece on a stable canvas, properly cared for, holds its clarity for many years without significant loss of definition.
Can micro realism be combined with geometric or fineline styles?
Yes, and it produces some of the most striking results. A photorealistic subject framed within precise geometric linework, or paired with single-needle botanical detail, creates strong visual contrast. The studio regularly works in these hybrid approaches. The Marcus Aurelius in Sacred Geometry piece is a clear example of this in practice.
How do I know if my reference image works at micro scale?
High-contrast references with clear light sources translate best. Busy backgrounds, very fine textures like individual hairs across an entire face, or images taken in flat lighting often need simplification. During consultation, the artist will flag what reads well at the intended size and suggest any adjustments before drawing begins.
How many sessions does a micro realism tattoo typically need?
Most standalone pieces in this style complete in a single session of one and a half to three hours. More complex compositions, or pieces forming part of a larger sleeve, may require a second session for refinement after the skin has fully healed. Full healing typically takes around eight weeks.