What You're Actually Looking At
Picture a hummingbird on a forearm. Not a stylised outline, not a simplified icon. A bird that looks like a photograph, complete with iridescent feather texture, a catchlight in the eye, and wing edges that fade cleanly into bare skin. That's the promise of a micro realism tattoo. The style takes the same techniques used in large photorealistic work and compresses them into a canvas typically under 8cm wide.
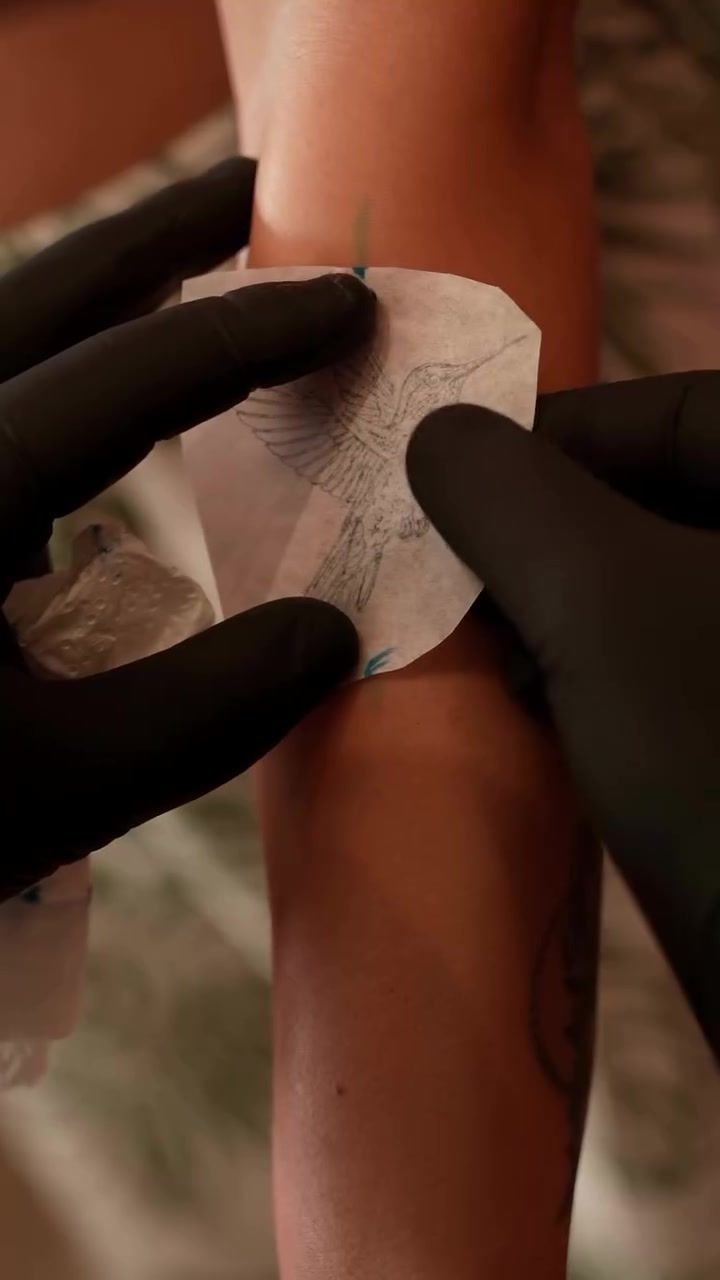
The difference between realism and micro realism
Full realism tattoos. A portrait covering a thigh, a wildlife scene across a back panel. Give an artist room to build gradients slowly, layer shadows across centimetres of skin, and let the eye resolve fine transitions from a comfortable viewing distance. Micro realism removes that breathing room entirely. Every element has to read at close range and compress without turning to visual noise. Same technique. Radically different discipline.
Think of it like miniature portrait painting. The craft tradition goes back centuries; the 16th-century miniaturists working on ivory at postage-stamp scale were solving the same fundamental problem. How do you make something small feel complete, rather than merely shrunken?
Why the Scale Makes Everything Harder
A 1mm stencil drift on a 30cm sleeve is nearly invisible. On a 5cm piece, it shifts the composition entirely. If the stencil sits 2mm off-centre on a tightly framed portrait, you'll see it every time you look at the piece. There's no surrounding space to draw the eye away from the error.
Needle control at small scale
The studio uses single-needle (1RL) and tight three-needle (3RL) groupings for most small detailed tattoo work. A 1RL needle deposits ink in the narrowest possible channel, which matters when two elements of a composition are separated by less than a millimetre. Wider groupings. The kind used to pack solid black or cover large areas quickly. Simply can't resolve that kind of detail without bleed. The fineline technique and micro realism overlap heavily here: both rely on minimal needle contact and controlled hand speed to preserve edge sharpness.
Ink density and line weight
Shadow gradients in a large realism piece can transition across several centimetres. In a compact photorealistic piece, that same gradient might span 8mm. If you push too much ink too fast, the mid-tones merge and the piece reads as a grey smudge rather than a dimensional form. Grey-wash discipline. Diluting black ink to precise concentrations and applying it in controlled passes. Is what separates a micro realism tattoo that holds its depth from one that flattens out within a year. Experienced artists also pre-compensate for ink migration. As the dermis shifts pigment slightly over time, fine details soften. Building stronger contrast upfront means the piece still reads well a decade in.
Where Micro Realism Comes From
The style grew directly out of classical realism tattooing, which itself borrowed from academic painting traditions: careful observation, tonal modelling, and the goal of optical illusion on a three-dimensional surface. What changed in the last fifteen years was the audience's eye. Social media, particularly Instagram, let people see tattoos at extreme close-up. Clients started requesting pieces that could hold up under a camera lens rather than just across a room.
That shift drove artists toward finer needles, slower passes, and smaller formats. A portrait the size of a €2 coin became a legitimate creative ambition rather than a technical impossibility. The style suits clients who want emotional or visual impact without committing to heavy coverage. A single sharp piece rather than a larger composition.
You can read more about what the style demands from an artist in Lisbon, including how the local studio context shapes the work.
How the Studio Approaches Micro Realism
Reference images and consultation
The consultation starts with your reference material. High-resolution images are non-negotiable. A blurry phone screenshot taken in poor light gives the artist an unreliable starting point, and errors in the reference translate directly into errors in the design. Bring the sharpest, most clearly lit version of your subject that you can find. Strong contrast between light and shadow areas makes the compression process significantly more accurate.
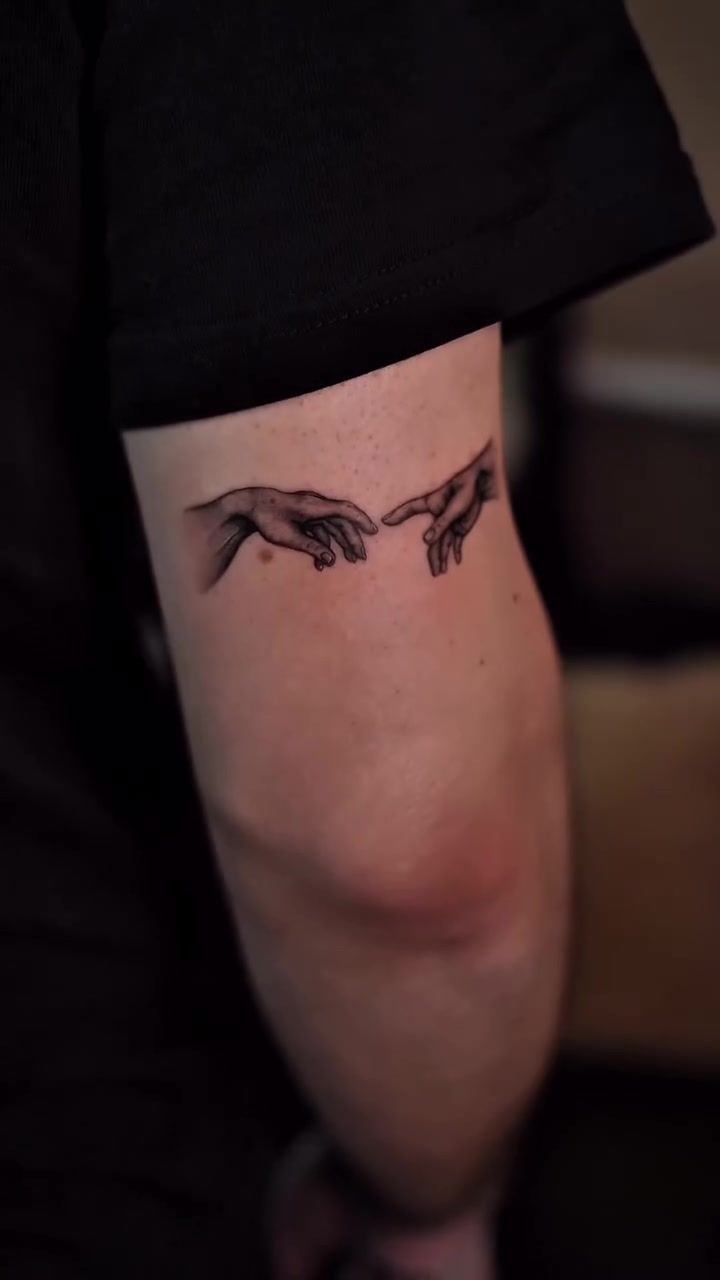
Design compression and composition
The artist's job during design is to edit ruthlessly. A reference photo might contain fifty details. A 6cm tattoo can carry perhaps fifteen of them convincingly. The rest get dropped or implied. Texture in background areas gets simplified to a tone. Secondary elements get reduced to suggestion. What survives is whatever the eye reads first. The focal point, the strongest light source, the defining edge. This is why the studio asks for time during consultation: the compression decisions are where the design either succeeds or doesn't.
Before any ink is placed, the stencil goes on and gets checked against the natural curves of your body. A flat stencil applied to a rounded forearm will distort. The artist adjusts placement until the proportions read correctly from the intended viewing angle, then commits. You can explore the full range of micro realism tattoos at the studio to see how different subjects translate across different formats.
"The reference is where you start, not where you finish. What goes onto skin has to be designed for skin. Not for a screen."
Placement, Sizing, and What to Expect
Best placements for micro realism
Flat, stable surfaces give photorealistic detail the best environment to last. The outer forearm, upper arm, chest, calf, and upper back all work well. These areas move, but they don't flex sharply through the precise zone where the tattoo sits. The skin stays reasonably consistent in tension, which means lines stay where the artist placed them.
Avoid high-flex joints if you want the fine detail to hold. The inner elbow crease, the wrist crease, and finger skin all experience repeated mechanical stress that can cause fine lines to blur or break down faster than the same work on a stable surface. For more on choosing the right spot, the guide on why small work demands the most precision covers placement logic in useful detail.
- Outer forearm: excellent. Flat, visible, stable
- Upper arm: excellent. Good surface area, rarely distorted by movement
- Chest: good. Mostly stable, but follow the natural contour carefully
- Calf: good. Muscular base holds stencil proportions well
- Inner elbow or wrist crease: avoid for high-detail work
- Fingers: not recommended for photorealistic styles
Session length and realistic timelines
Most small detailed tattoo sessions at this studio run between 1.5 and 3 hours, depending on complexity and the number of tonal layers involved. A single animal portrait in the 5-6cm range typically takes around two hours. A more complex scene with multiple subjects or background elements may need an additional session. The artist won't rush grey-wash passes. Each layer needs time to settle visually before the next one goes in.
| Placement | Longevity of fine detail | Risk factors |
|---|---|---|
| Outer forearm | High | Sun exposure if left unprotected |
| Upper arm | High | Low. Minimal flex, good skin stability |
| Chest | Medium-high | Contour distortion if stencil not adjusted |
| Calf | Medium-high | Can swell during session; book morning slots |
| Inner elbow crease | Low | Repeated flex breaks down fine lines quickly |
| Fingers | Very low | High fade and blow-out risk regardless of style |
Healing Realities for Micro Realism
What you see at day three is not the finished tattoo. During the first two weeks, the skin surface peels and the top layer of ink lifts with it. This looks alarming. It isn't. The pigment that matters is in the dermis, the layer beneath, and it stays put. The healed result only becomes visible once the new skin fully settles, which takes six to eight weeks for fine-line and photorealistic work.
Sun exposure is the single biggest threat to photorealistic detail over time. UV light breaks down ink pigments and accelerates the softening of fine gradients. Once your tattoo is healed, SPF 50 over the area whenever it's exposed to direct sun is a reasonable standard practice. In Lisbon's summer months, that window runs long. The Atlantic light is strong from May through to October, and the UV index regularly hits 9 or 10 between noon and 4pm. Keep fresh tattoos fully covered and out of pool chlorine for at least three weeks after your session.
- Days 1-3: redness and swelling are normal; keep the area clean and lightly moisturised
- Days 4-14: peeling phase. Do not pick or scratch; let skin shed naturally
- Weeks 2-6: the surface looks healed but the dermis is still settling
- Week 6-8: the actual healed result becomes visible. This is what the tattoo will look like going forward
- Once healed: apply SPF 50 on sun-exposed days, indefinitely
Lisbon's summers also bring humidity, which can slow surface healing slightly. Keep the area dry between gentle washes during the first ten days, and avoid long beach sessions or sweaty outdoor activity for at least two weeks post-session.
Frequently Asked Questions
What is a micro realism tattoo?
A micro realism tattoo renders a photorealistic image. A portrait, animal, object or scene. At a very small scale, typically under 8cm. The artist uses fine needles, precise grey-wash shading, and compressed composition to pack the same visual depth as a large realism piece into a fraction of the space.
How small can a micro realism tattoo be?
Most experienced artists work within a 4-8cm range for this style. Below 3-4cm, detail becomes so compressed that shadows and highlights merge, and the piece can lose definition within a few years of healing. The right minimum size depends on the complexity of your subject. A simple silhouette can go smaller than a detailed portrait.
Do micro realism tattoos age well?
They can age very well if placed on low-flex areas, kept out of prolonged sun exposure, and touched up when needed. Fine detail naturally softens over years as ink migrates slightly in the dermis. A skilled artist accounts for this upfront by building contrast that holds through the ageing process.
How do I choose the right reference image for a micro realism tattoo?
Use the highest-resolution photo available. Sharp, well-lit, and with strong contrast between light and shadow. Avoid images with too many competing elements. The artist will simplify the composition for skin, but a crisp starting point makes the design process significantly more accurate and reduces guesswork during compression.
Is micro realism suitable for first-time tattoo clients?
Yes, size-wise it's manageable for a first sitting. Sessions typically run 1.5 to 3 hours. The main consideration is staying still during fine detail work. Tiny photorealistic tattoo work requires steadiness from both the artist and the client. If you're nervous, discuss placement options with the studio before booking so you can choose a comfortable, accessible spot.